Follow the steps below to deploy the PKI Hub image as a virtual machine with the Nutanix Prism Element portal.
To create a PKI Hub virtual machine with Nutanix Prism Element
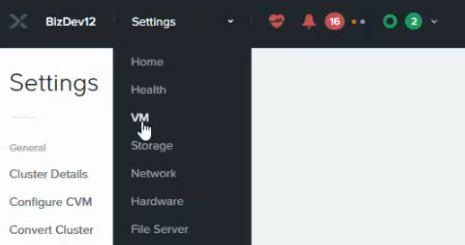
- Log in to your Nutanix Prism web portal and select Settings > VM.
- Click Network Config in the top-right corner.
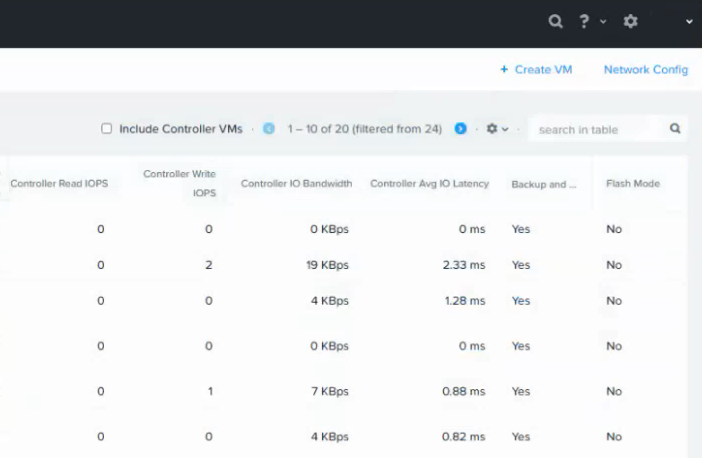
- Create a new network or configure an existing one to meet the Network requirements.
- Click + Create VM in the top-right corner.
- Configure the following settings in the Create VM dialog.
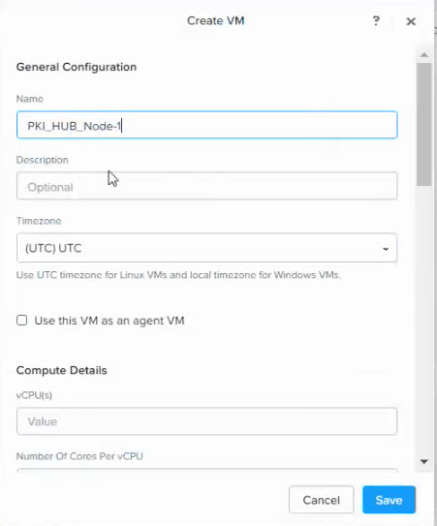
- Click Save and wait for the virtual machine to be created.
- Write the name of the new virtual machine in the top-right search box.
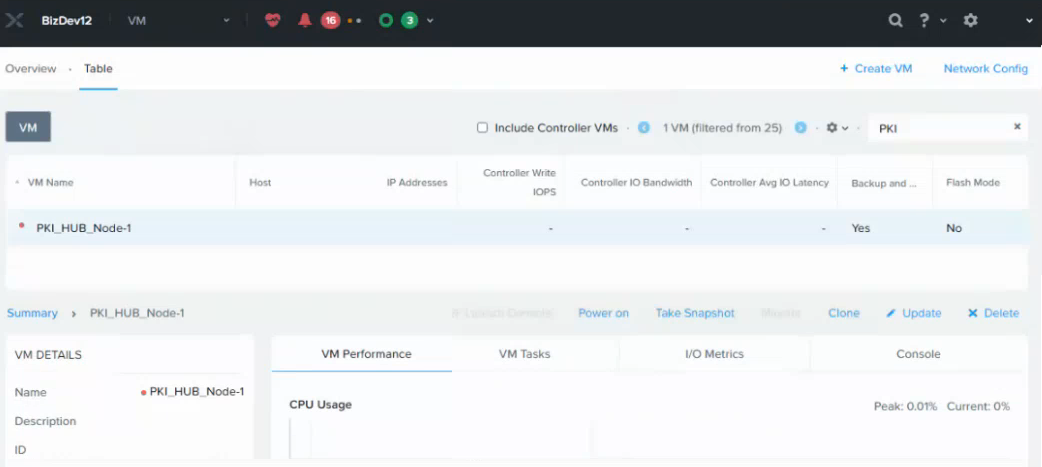
- Select the new virtual machine in the content pane and click Power On in the bottom menu.
- Click Launch Console in the bottom menu and wait for PKI Hub to start.
- Log in with the
sysadminusername and thechangeme password. - When prompted, change the initial password to one that meets the requirements described in the Password policy CIS benchmarks.
General Configuration
Configure the following settings.
Setting | Value |
|---|---|
Name | Enter a unique name for the new virtual machine. For example, CSP_NODE_1. |
Description | Enter an optional description for the new virtual machine. |
Timezone | Select a timezone for the new virtual machine. |
Use the VM as an agent VM | Do not enable this checkbox. |
Compute Details
Configure the following settings.
Setting | Value |
|---|---|
vCPU(s) | Enter the number of cores recommended in Machine requirements. |
Number Of Cores Per vCPU | Select 1. |
Memory | Enter the RAM size recommended in Machine requirements. |
Boot Configuration
Select either Legacy Boot or UEFI.
Disks
Click the pencil edit button for CD-ROM and configure the following settings in the Update Disk dialog,
Setting | Value |
|---|---|
Operation | Select Clone from Image Service. |
Bus Type | Select SATA. |
Image | Select the name previously assigned to the PKI Hub image when Uploading the PKI Hub ISO image with Nutanix Prism Element. |
Click + Add New Disk to configure the root and etcd disks described in Machine requirements.
Setting | Root disk | etcd disk |
|---|---|---|
Type | Disk | Disk |
Operation | Allocate on Storage Container | Allocate on Storage Container |
Bus Type | SCSI | SCSI |
Storage Container | The container for the new virtual machine | The container for the new virtual machine |
Size | At least 1 TiB | At least 15 GiB |
Index | Next Available | Next Available |
As explained in Machine requirements, CPUs manufactured before 2012 (processors earlier than Intel Ivy Bridge and Xeon E5 v2) do not support the RDRAND instruction. If the Nutanix host runs one of these old CPUs:
- Click + Add New Disk.
- In Device Type, select VirtIO RNG.
- Set the entropy source to
/dev/urandomon the host.
This configuration exposes /dev/hwrng inside the virtual machine, allowing the rngd service to start.
Without either RDRAND support or a VirtIO RNG device, the installation cannot proceed.
Network Adapters (NIC)
Click + Add New NIC and configure the following settings in Create NIC.
Setting | Value |
|---|---|
Subnet Name | Select a subnet meeting the Network requirements. |
Network Connection Status | Select Connected. |
Click + Set Affinity to select the host that will run the virtual machine.